Sunday 20 February 2011

Screen Shots For My Digi-Pak.

Today I took some photos for my front cover of the Digi-Pak. I wasn't too sure on what I wanted the girl to do on the front cover, so I did a variety of shots. Overall, I took 107 shots, and there are quite a few which I am happy to use in my Digi-Pak.

After transferring the images to the computer, I will use Photoshop to edit them. I have already started to edit my CD, so hopefully my Digi-Pak will be completed soon.

Below are some screen shots of the editing done on my CD:

In the screen shot above, I was changing my font on the disk so that it was an arc shape, therefore fitting around the CD effectively.

In the screen shot above, I have set out how my Digi-Pak will look when I merge my images together.

In the above screen shot, I am creating a panel for my Digi-Pak. I decided to use polaroid pictures as a frame, and add the picture I took over the top. I feel its a nice effect, as it looks like pictures are stacked on top of each other.

In the above screen shot, I am colouring around my CD. I am doing this because the original background colour was white, and I felt this did not fit into the theme of my Digi-Pak.


Photoshop.

I am currently experimenting with different effects and possibilities for my Digi-pak. It has been a while since I have used Photoshop, so I need to remind myself how it works!

While filming, I took a few photo's, but while experimenting I took a still from my video. I have a rough idea of what I want my Digi-pak to look like, but I am still unsure of what to do with my pictures.

Below are some screen shots of the possibilities I could do in Photoshop:

This is the original still-shot.

The above picture has similarities to the artist Roy Lichtenstein with the Benday dots.


The above edit is called Poster Edges. 

In the above screen shot, I have coloured her hair a red colour, while still making it look natural. I also coloured her eyes purple, and made her lips a pink colour and made her eyebrows slightly darker.


In this edit, I changed the colour of the background, which is what I will need to do in my Digi-pak. I have also added text to represent what I will need to do when making my front cover and the song list on the back of the pack.


Tuesday 15 February 2011

How I would like my Digi-Pak to look.

After researching some Dig-Paks, I have decided what I would like to include in the one that I am making.
From looking at older album covers, for example by The Smiths or Blondie, to more recent album covers such as Vampire Weekend, I have decided that the style that would best suit my Digi-Pak is a plain and simple cover, with a direct mode of address which captures your attention.

I feel that this simplified style suits my music video, as the style I was going for was a relatively new and upcoming band that may not have much money, facilities, etc, therefore it looks quite raw. This style of video is similar to Arctic Monkeys 'I Bet That You Look Good On The Dancefloor', and a couple of The Drums music videos, such as 'Best Friend' and 'Lets Go Surfing'.


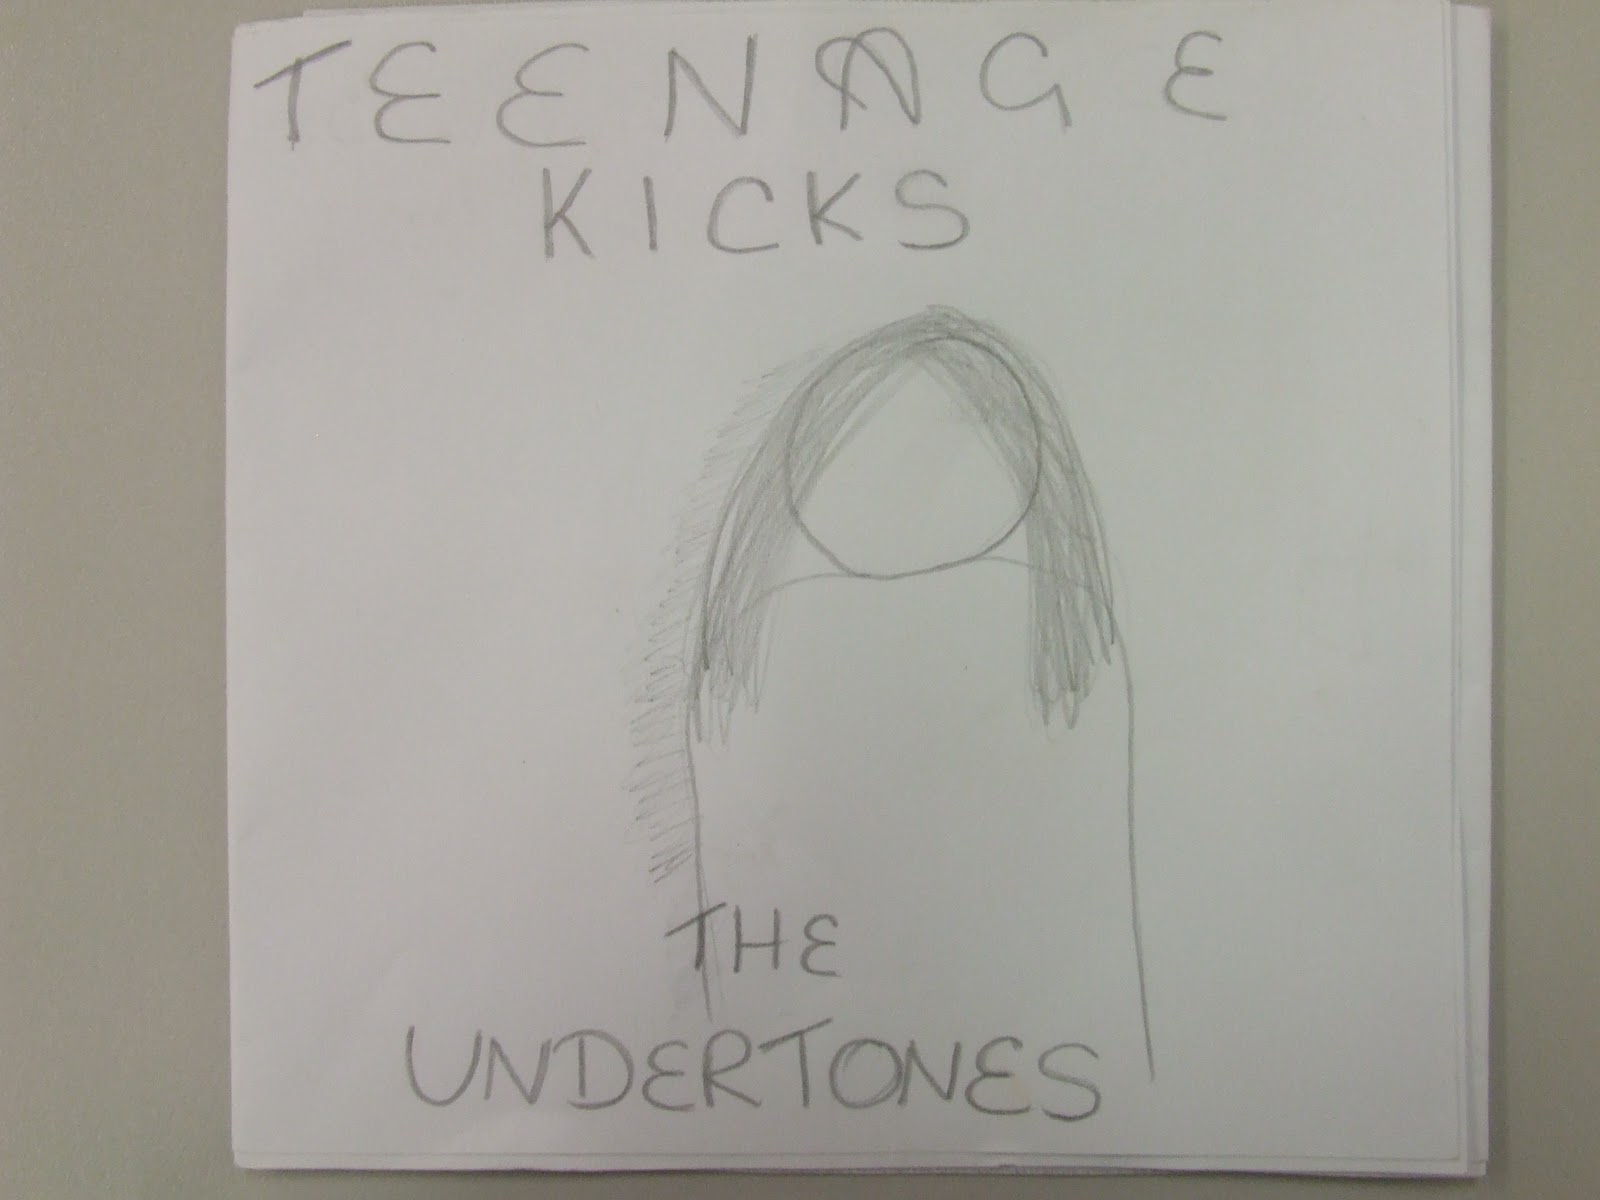
The picture above is of the front of my Digi-Pak, and I am choosing to have a picture of the girl in the music video as the direct mode of address. I haven't yet decided what pose I want her to do, but I will take a range of shots so I can be sure I get the right one.

I will include bold writing at the top, saying 'Teenage Kicks' and at the bottom in a smaller font saying 'The Undertones'. I feel that by doing this, it will be bold and eye-catching.


The picture above is of the images you will see when you open the first side of the Digi-Pak. On the left is a still from my music video, and it is of the different parts of the band, e.g. the guitarist, the singers head and the drummers foot. On the right is a group picture of the band and of the girl. I feel that these are good pictures to use for my Digi-Pak because one of them shows a split screen, which mirrors my music video well as there are quite a few split screen in it, and the second picture is of everyone in the video at the location where it was filmed, and this makes the picture relevant to my music video.
I will possibly have a black border around the pictures to make them stand out.


The picture above is of the middle part of the Digi-Pak: the disk. I have decided that the disk will be designed like a vinyl record to give it a slight retro feel. The background behind the disk will be the same as the disk, i.e. a picture of the same record. Not many artists have done this, although the times it has been done it look effective and different to your ordinary disk.


The above picture is of the back of the Digi-Pak; where the song lists will be. The image will be of the lead singer leaning against a brick wall with the song list next to him. The songs will be inside white boxes and in black font. By doing this, it makes the words stand out against the brick wall the picture is taken by.


Above are my six panels all together. They are made up of pictures taken while filming, after filming, and still's from the video. I feel that by using these images, I will create a simple but bold Digi-Pak that captures potential buyers attention.

Thursday 10 February 2011

Screen shots in the process of creating music video.

Below are some split screens of my editing my video on Premiere Pro. In the first picture, I am adding a cross dissolve effect to the start and end of a clip to add continuity to my video.


In the picture below, I have added in a start and end title to my video. It says 'Teenage Kicks' and 'The Undertones' underneath. It is in white writing which stands out against the black back ground. This will make my video more realistic.


In this picture, I have created a split screen by putting video clips on top of each other. I left a gap between each section so that it defines each screen instead of them merging together.


Again, below is an example of split screen. This time I have only featured two screens. In this shot I tried to achieve the effect that one of the band members was passing the phone through the screen and different levels of zoom.


Below is a shot of all the band together performing. As you can see, the time line under the screen has lots of different cuts, split screens, and effects.


Wednesday 2 February 2011

Screen Shots

Below are a few screen shots of my progress on Premier Pro. I have added some subtle lighting effects, and have also used split screen.

I am currently still working on editing my music video.

The above picture is of the time line I use while editing my video.


The above screen shot is the tool box I used when cropping parts of my video and when I used different lighting effects. I feel that by using tools like these I am improving my knowledge and skills on Premier Pro.

The above screen shot is of the tool bars I have used and of the screen I use to see what my film looks like.